




 Click here for English version!
Dübel für die Pilzzucht auf Holz, Stroh und Kaffeesatz
Auf welchem Material möchtest du Pilze züchten?
Bitte auswählen:
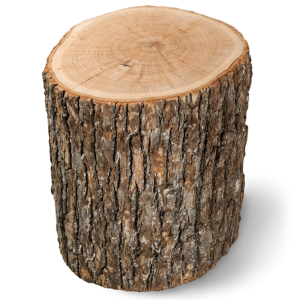
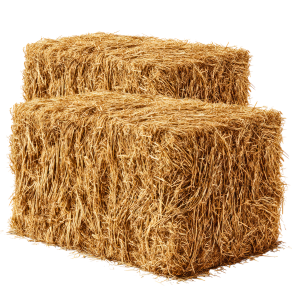
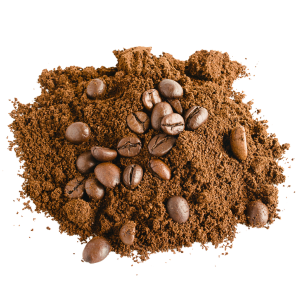
Pilzzucht auf Holz
Inhaltsübersicht
Vor dem Anbau gut zu wissen
Haltbarkeit
Die Pilzdübel können für bis zu 12 Monate im Kühlschrank zwischengelagert werden. Eine kurzfristige Aufbwahrung (maximal 1-2 Monate) ist auch bei Raumtemperatur möglich.
Anlagezeitpunkt
Idealerweise legst du deine Holz-Pilzkultur im Frühling oder im Spätsommer an. Je nach Region sind auch andere Zeitpunkte möglich, solange in den ersten zwei Monaten nach dem Anlegen kein Frost auftritt.
Vermieden werden sollte in der Anfangsphase ebenfalls hochsommerliche Hitze und Trockenheit. Am besten berücksichtigst du das schon vorab und planst den Anlagezeitpunkt entsprechend.
Ausreichende Dübelmenge
Es ist zwingend notwendig, ausreichend Pilzdübel zu verwenden, da es andernfalls zu einem Totalausfall der Pilzkultur kommt. Wir empfehlen für eine Packung mit 20 Dübeln ein Holzstück mit höchstens 30-40 cm Durchmesser und Höhe.
Die Dübelmenge kann nach Belieben erhöht werden, um das Ausfallrisiko zusätzlich zu senken und die Dauer bis zur Ernte zu verkürzen. Ebenso ist es möglich, die Pilzkultur auf einem größeren Holzstück anzulegen, solange die Anzahl der Dübel äquivalent erhöht wird.
Dauer bis zur ersten Ernte
Für die Pilzzucht auf Holz braucht es etwas Geduld. Es dauert nämlich relativ lange, bis sich das Myzel im Holzstamm ausgebreitet hat und bereit für die Fruchtkörperbildung ist. Je nach Witterungsbedingungen und Holzart dauert es daher mindestens 12 bis 24 Monate, bis du mit ersten Ernteerträgen rechnen kannst.
Deine Geduld belohnt die Pilzkultur mit reichlichem Wachstum und mehrjährigen Erntewellen!
Welches Holz kann ich verwenden?
Grundsätzlich können verschiedenste Laubhölzer verwendet werden - Nadelholz ist in allen Fällen ungeeignet. Besonders zuverlässig sind die nachfolgend aufgelisteten Sorten.
Austernpilz
Limonenpilz
Das Holz muss zwingend frisch (vor einem bis maximal sechs Monaten gefällt) sein. Die Rinde solte möglichst unbeschädigt sein. Zeigt das Holz an der Schnittfläche bereits sehr tiefe Risse, so ist es zu trocken und muss vorab für 24 Stunden gewässert werden.
Die Pilze wachsen am besten auf dicken Hölzern ab 20-40cm Durchmesser bei einer Länge von 30-40cm. Shiitake bevorzugt dünnes Holz mit ca. 1m Länge und einem Durchmesser von 10-25cm.
Der richtige Standort
Suche dir einen feuchten, schattigen und möglichst windgeschützten Platz im Garten, idealerweise zum Beispiel unter Laubbäumen oder Büschen. Beachte, dass Temperaturen über +38 °C das Myzel abtöten können.
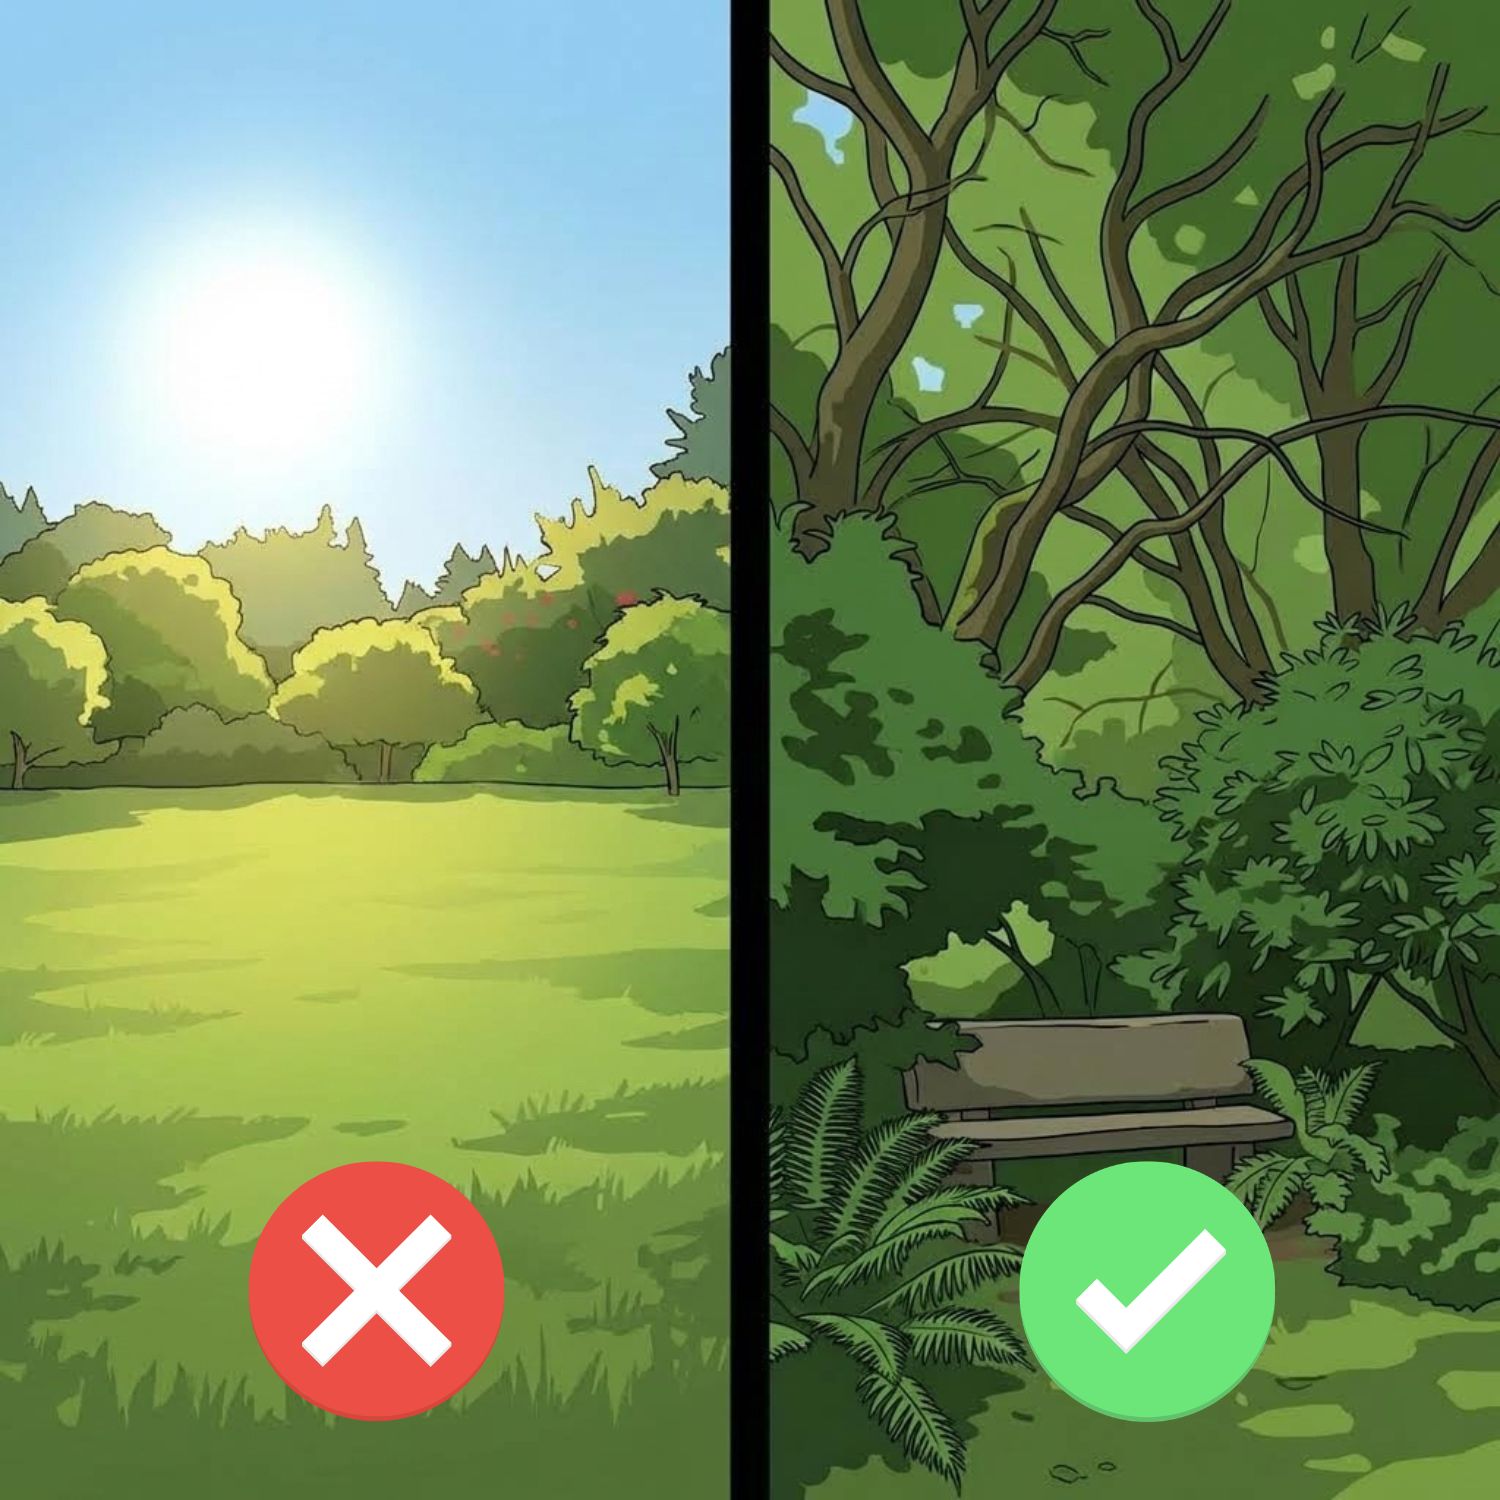
Die Pilzbrut wächst ab etwa +10 °C, am schnellsten bei rund +25 °C. Nach etwa drei Monaten innerhalb dieses Temperaturbereichs ist die Pilzkultur frostfest.
So legst du deine Pilzkultur an
Schritt 1
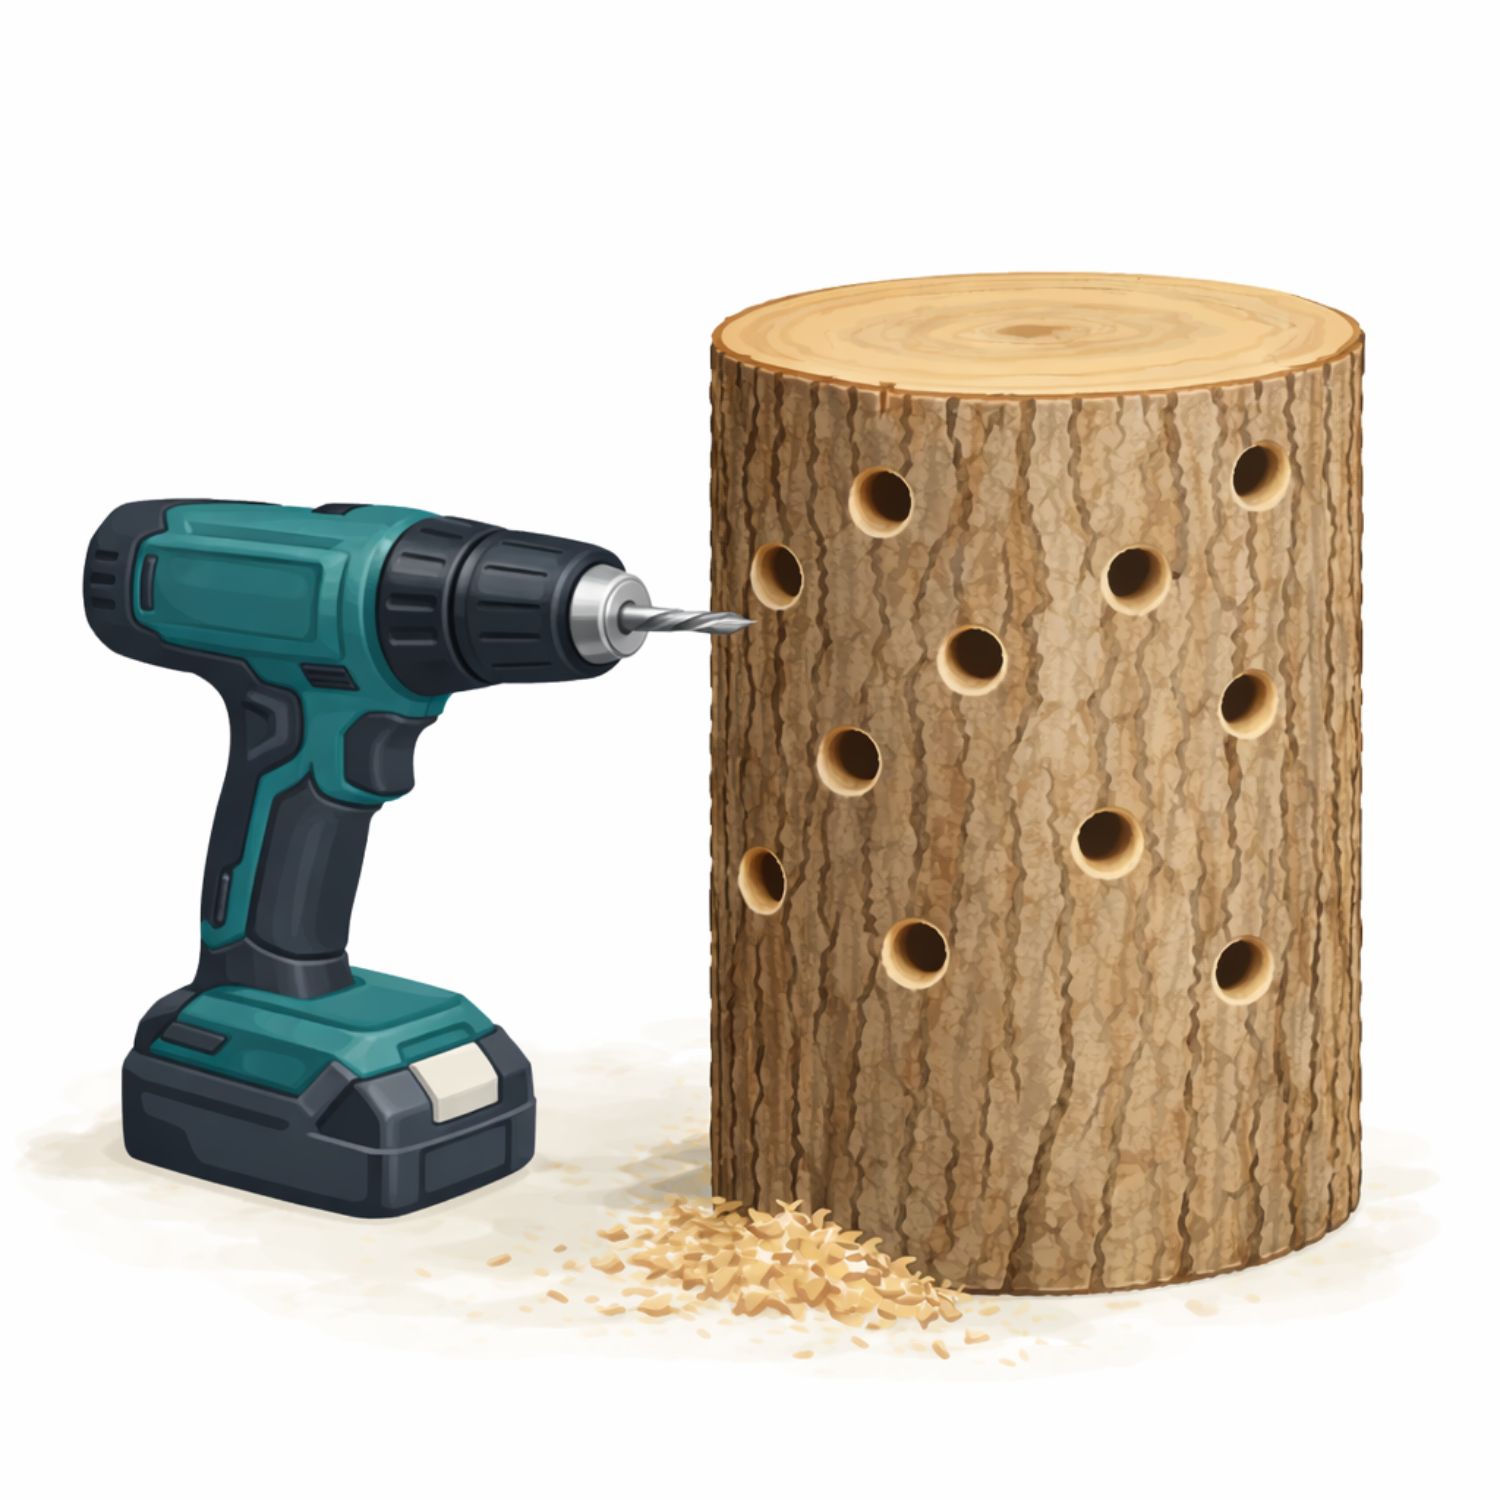
Bohre mit einem 8-9mm Bohrer seitlich und gleichmäßig verteilt rund um den Stamm für jeden Dübel ein ca. 5cm tiefes Loch. Der Durchmesser der Löcher sollte nicht zu groß gewählt werden, sodass zwischen dem Myzel in den Dübeln und dem Holz guter Kontakt besteht. Wichtig ist, dass die Löcher sauber bleiben. Sägespäne sind dabei aber kein Problem.
Schritt 2
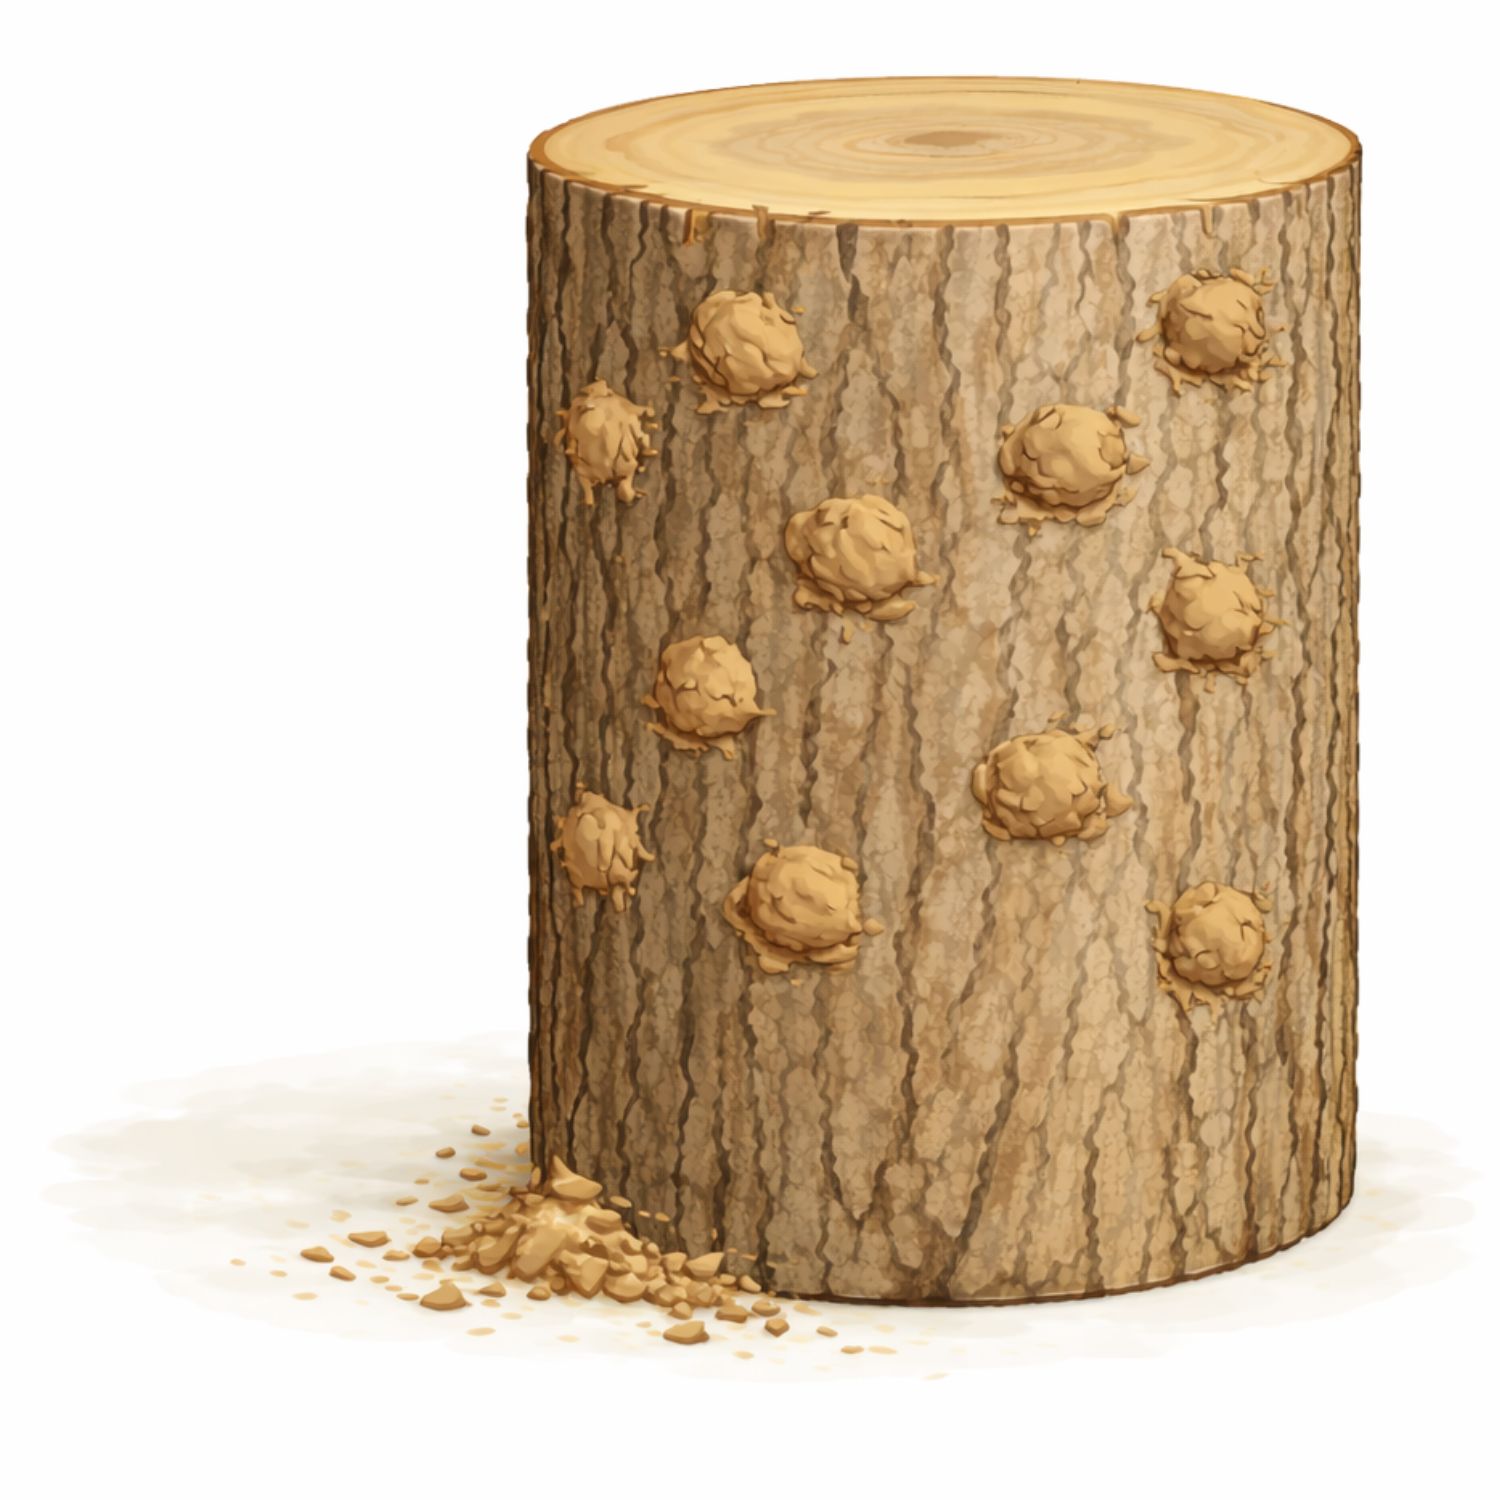
Stecke nun in jedes Loch einen Dübel. Verschließe die Löcher danach mit Klebeband, Korken, Lehm oder Bienenwachs, damit die Stäbchen nicht herausfallen und vor Verschmutzung geschützt sind. Wenn du Klebeband benutzt, klebe dieses am besten einmal um das Holz herum, damit es sich durch die Witterung nicht direkt wieder löst. Achte dabei aber darauf, genug Platz für die Fruchtkörper unbeklebt zu lassen.
Schritt 3
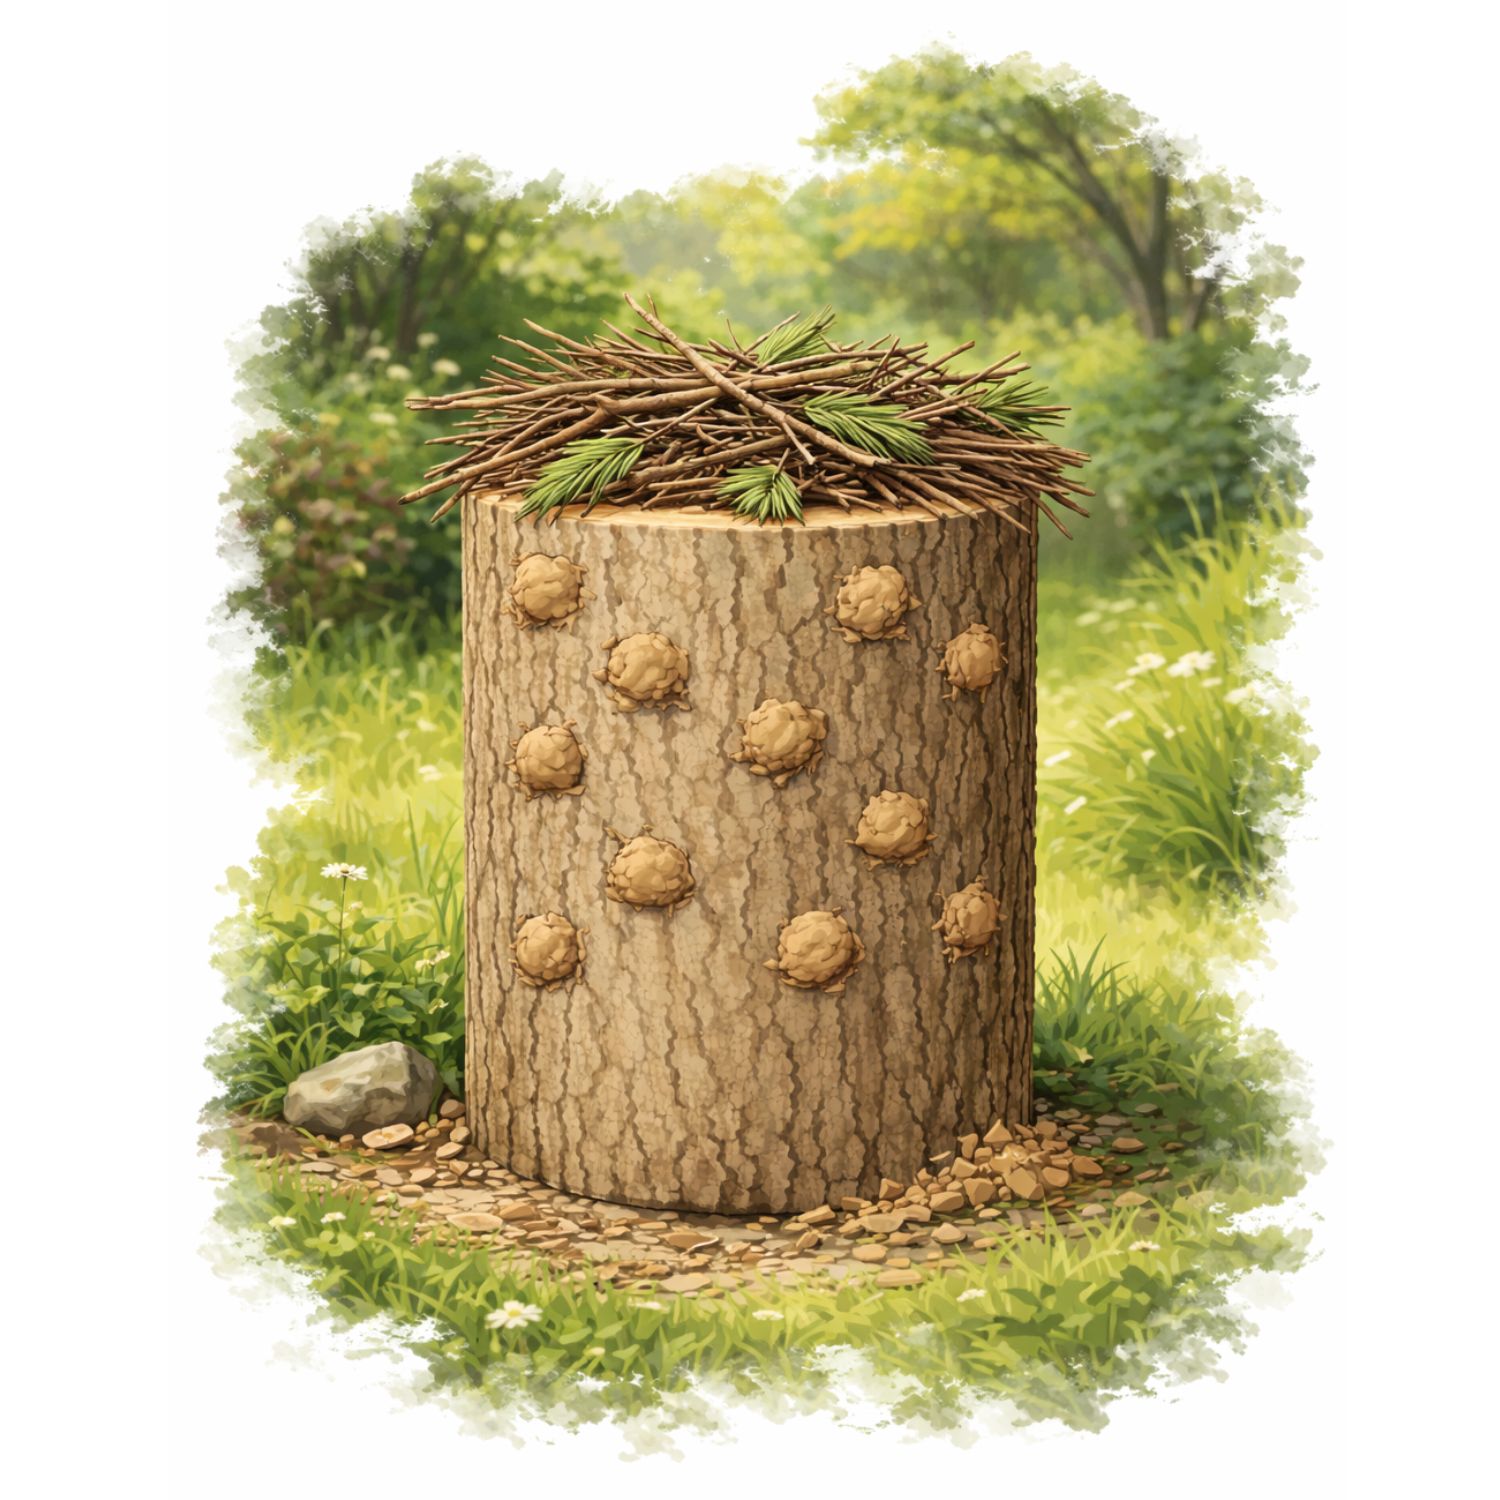
Stelle das Holz nun an einem geeigneten Standort im Garten auf und grabe es für eine bessere Entwicklung idealerweise einige Zentimeter in den Boden ein. Wenn du Shiitake züchtest, kannst du das längere Holzstück einfach waagrecht am Boden ablegen. Decke das Holz zum Schutz nun noch mit organischem Material wie Reisig, Stroh, einem Jutesack oder etwas ähnlichem ab.
Schritt 4
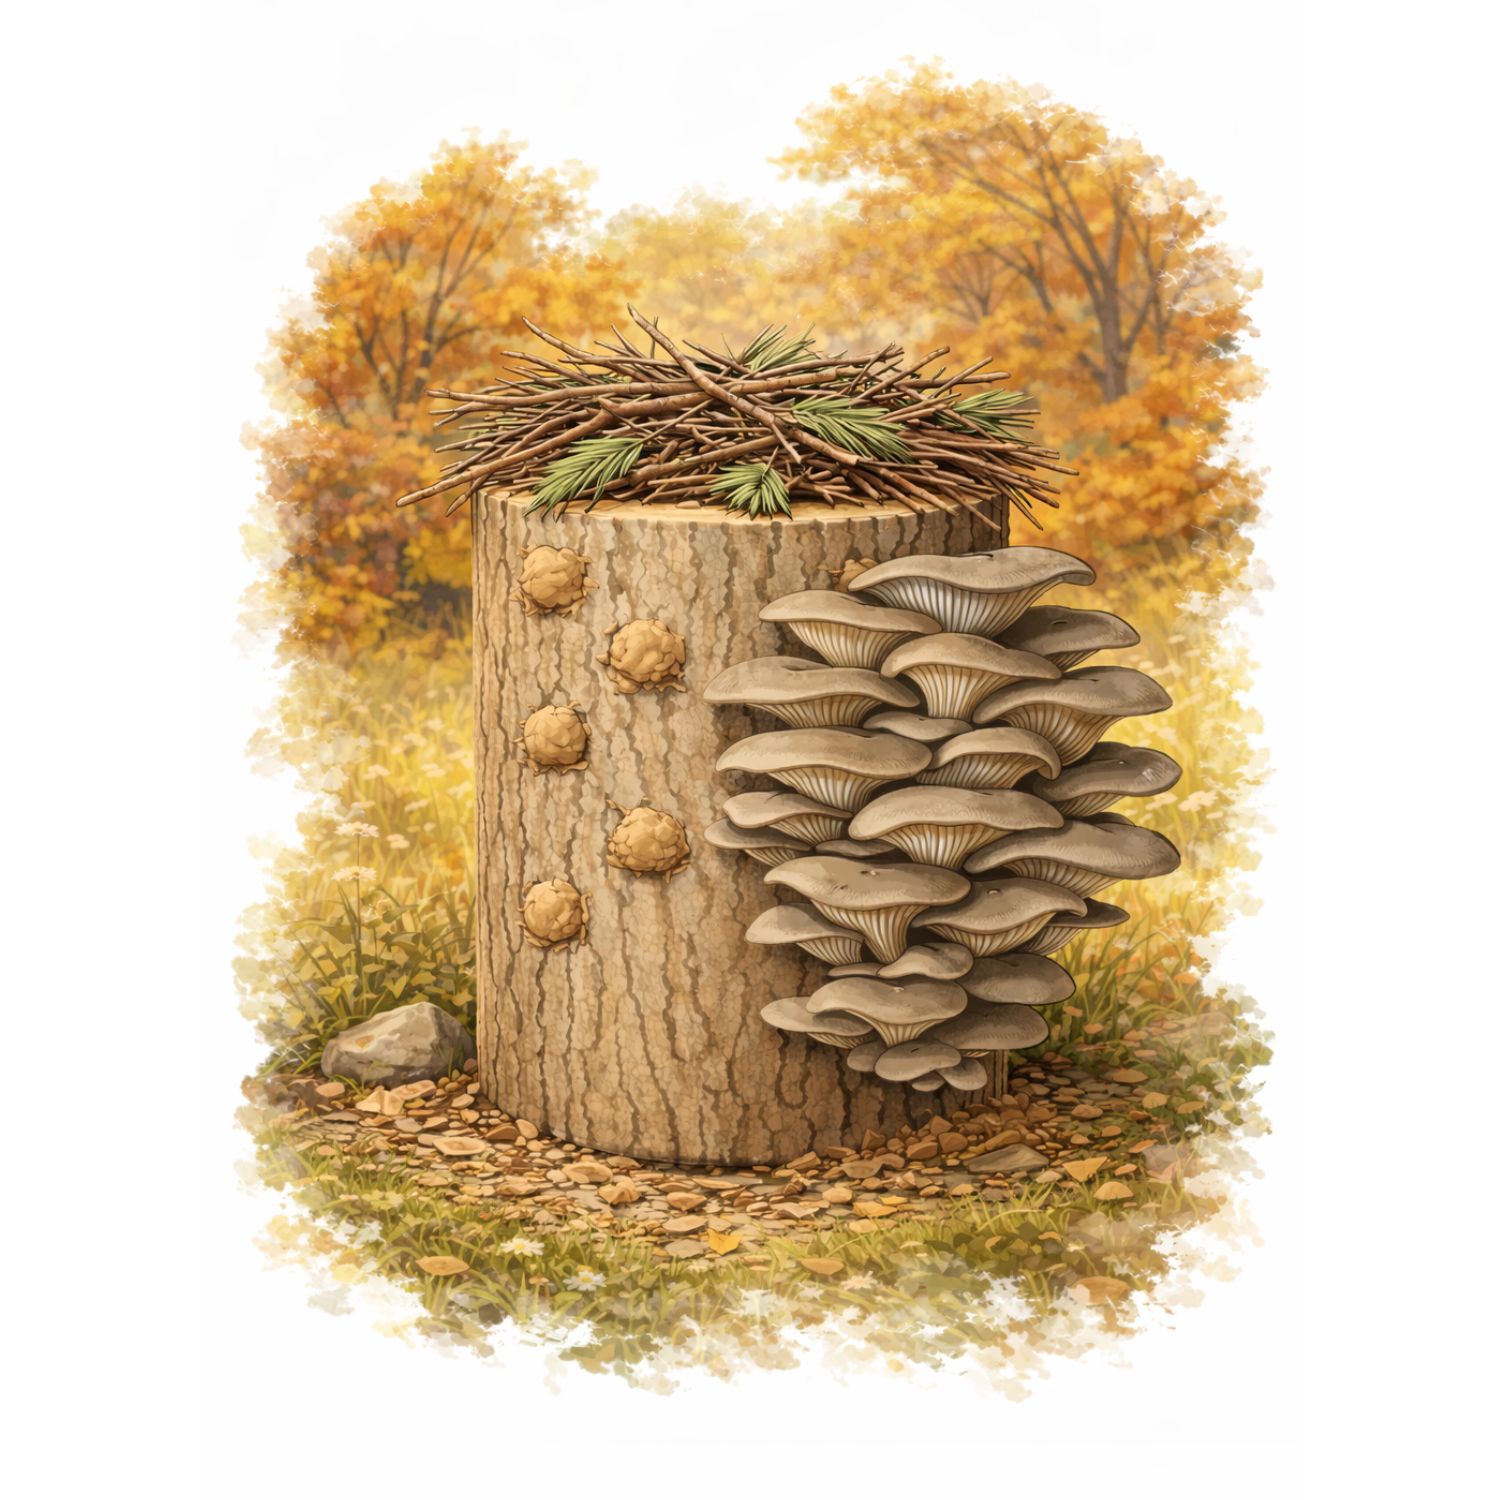
Schon ist die Pilzkultur fertig angelegt.
Schütze sie durch Gießen bei lang anhaltender Trockenheit und vor starker Nässe bei Dauerregen, indem du (nur) für diese Zeit eine Folie überstülpst. Achte schon frühzeitig auf Schutz vor Schnecken, denn sie werden deine Pilze lieben!
Rund um die Ernte
Die Dauer bis zur ersten Ernte hängt stark von der Holzsorte, der Pilzart und vor allem den Witterungsbedingungen ab. Meist liegt sie bei 12-24 Monaten. Fruchtkörper erscheinen nur bei milden Temperaturen und hoher (Luft-)Feuchtigkeit. Die Erntephasen liegen daher typischerweise im Frühjahr und im Herbst. Meist sprießen die Pilze über 3-5 Jahre immer wieder, bis die Nährstoffe im Holz endgültig verbraucht sind.
Bitte vergewissere dich vor dem Verzehr immer, dass es sich tatsächlich um den essbaren Zuchtpilz handelt!
Häufige Fragen & Antworten
Kann ich mehrere Pilzsorten auf einem Holzstück anbauen?
Muss ich die Pilzkultur nach dem Anlegen zusätzlich versorgen?
Wie viel und lange kann ich ernten?
Kann ich überprüfen, ob das Anlegen der Pilzkultur funktioniert hat?
Es wachsen Pilze, aber nicht die, die ich angebaut habe. Hat der Anbau nicht funktioniert?
Besonders in den ersten Wochen und Monaten, in denen sich das Pilzmyzel noch nicht stark ausgebreitet hat, siedeln sich oft schnell wachsende Fremdpilze an und bilden (oft relativ kleine) Fruchtkörper. Das kann passieren und bedeutet nicht, dass das Beimpfen fehlgeschlagen ist.
Entferne die Fremdpilze, um eine weitere Ausbreitung zu verhindern. Der eigentliche Zuchtpilz verdrängt das Fremdmyzel mit zunehmender Ausbreitung in der Regel vollständig.
Downloads & Videos
Pilzzucht auf Stroh
Inhaltsübersicht
Vor dem Anbau gut zu wissen
Haltbarkeit
Die Pilzdübel können für bis zu 12 Monate im Kühlschrank zwischengelagert werden. Eine kurzfristige Aufbwahrung (maximal 1-2 Monate) ist auch bei Raumtemperatur möglich.
Anlagezeitpunkt
Idealerweise legst du deine Holz-Pilzkultur im Frühling oder im Spätsommer an. Je nach Region sind auch andere Zeitpunkte möglich, solange in den ersten zwei Monaten nach dem Anlegen kein Frost auftritt.
Vermieden sollte in der Anfangsphase ebenfalls hochsommerliche Hitze und Trockenheit. Am besten berücksichtigst du das schon vorab und planst den Anlagezeitpunkt entsprechend.
Ausreichende Dübelmenge
Es ist zwingend notwendig, ausreichend Pilzdübel zu verwenden, da es andernfalls zu einem Totalausfall der Pilzkultur kommt. Wir empfehlen für eine Packung mit 20 Dübeln einen Strohballen mit 10 kg Trockengewicht.
Die Dübelmenge kann nach Belieben erhöht werden, um das Ausfallrisiko zusätzlich zu senken und die Dauer bis zur Ernte zu verkürzen. Ebenso ist es möglich, die Pilzkultur auf einem größeren Strohballen anzulegen, solange die Anzahl der Dübel äquivalent erhöht wird.
Dauer bis zur ersten Ernte
Für die Pilzzucht auf Stroh braucht es etwas Geduld. Es dauert etwa 6-16 Wochen je nach Witterungsbedingungen und Pilzart, bis der Strohballen mit Myzel durchwachsen ist.
Erst wenn das der Fall ist und geeignetes Wetter herrscht, können die ersten Pilze erscheinen. Wird deine Pilzkultur zum Beispiel im Frühjahr angelegt, so kann es sein, dass der Strohballen zwar schon im Juni mit Myzel durchwachsen ist, erste Pilze aber erst im Spätherbst wachsen, wenn es wieder kühl und feucht ist. Deine Geduld wird mit reichlichen Ernteerträgen über einen Zeitraum von etwa 12 Monaten belohnt.
Welches Stroh kann ich verwenden?
Du benötigst einen hochdruckgepressten Strohballen mit ca. 10 kg Trockengewicht. Achte darauf, das Stroh von einem Bio-Landbaubetrieb zu beziehen. Wurde das Getreide mit Fungiziden behandelt, lassen sich darauf keine Pilze züchten.
Das Stroh solte außerdem gesund und trocken sein. Das erkennst du an der goldgelben Farbe und an festen, nur schwer zerreißbaren Halmen. Muffiges Stroh soltest du nicht verwenden, da es oft bereits von Schimmelpilzen besiedelt ist. Geeignet sind insbesondere Weizen, Roggen oder Gerste – Hafer ist ungeeignet.
Der richtige Standort
Suche dir einen feuchten, schattigen und möglichst windgeschützten Platz im Garten, idealerweise zum Beispiel unter Laubbäumen oder Büschen. Beachte, dass Temperaturen über +38 °C das Myzel abtöten können.
Die Pilzbrut wächst ab etwa +10 °C, am schnellsten bei rund +25 °C. Nach etwa drei Monaten innerhalb dieses Temperaturbereichs ist die Pilzkultur frostfest.
So legst du deine Pilzkultur an
Schritt 1
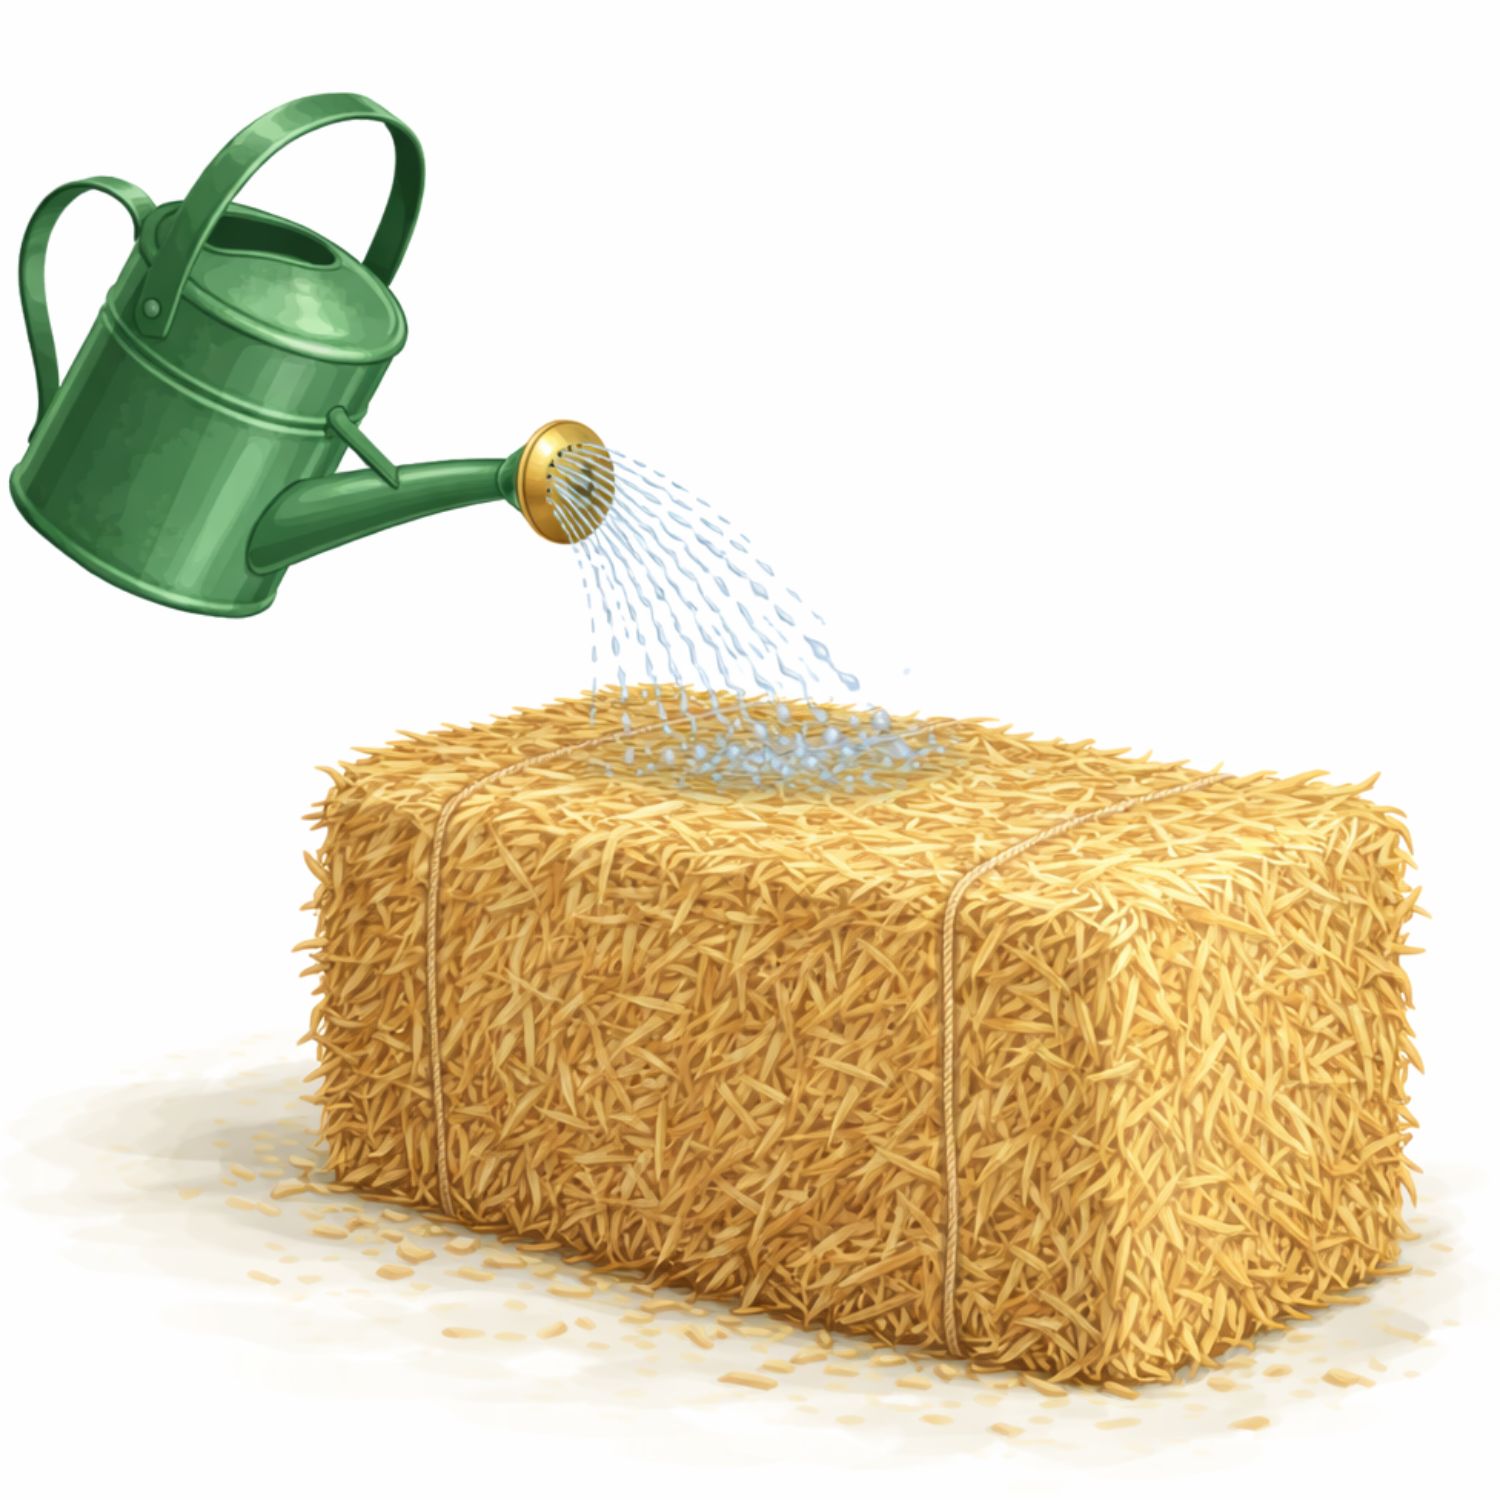
Das Stroh muss vor dem Beimpfen gut gewässert werden. Tauche den Ballen dafür etwa zwei Tage komplett in Wasser, zum Beispiel in einer Regentonne oder Schubkarre. Alternativ kannst du ihn über mehrere Tage immer wieder gründlich gießen, bis er ausreichend Feuchtigkeit aufgenommen hat. Warmes Wasser beschleunigt die Wasseraufnahme. Ziehe zur Kontrolle einen Büschel aus dem Inneren und winde es: Bilden sich Wassertropfen, ist es feucht genug.
Schritt 2
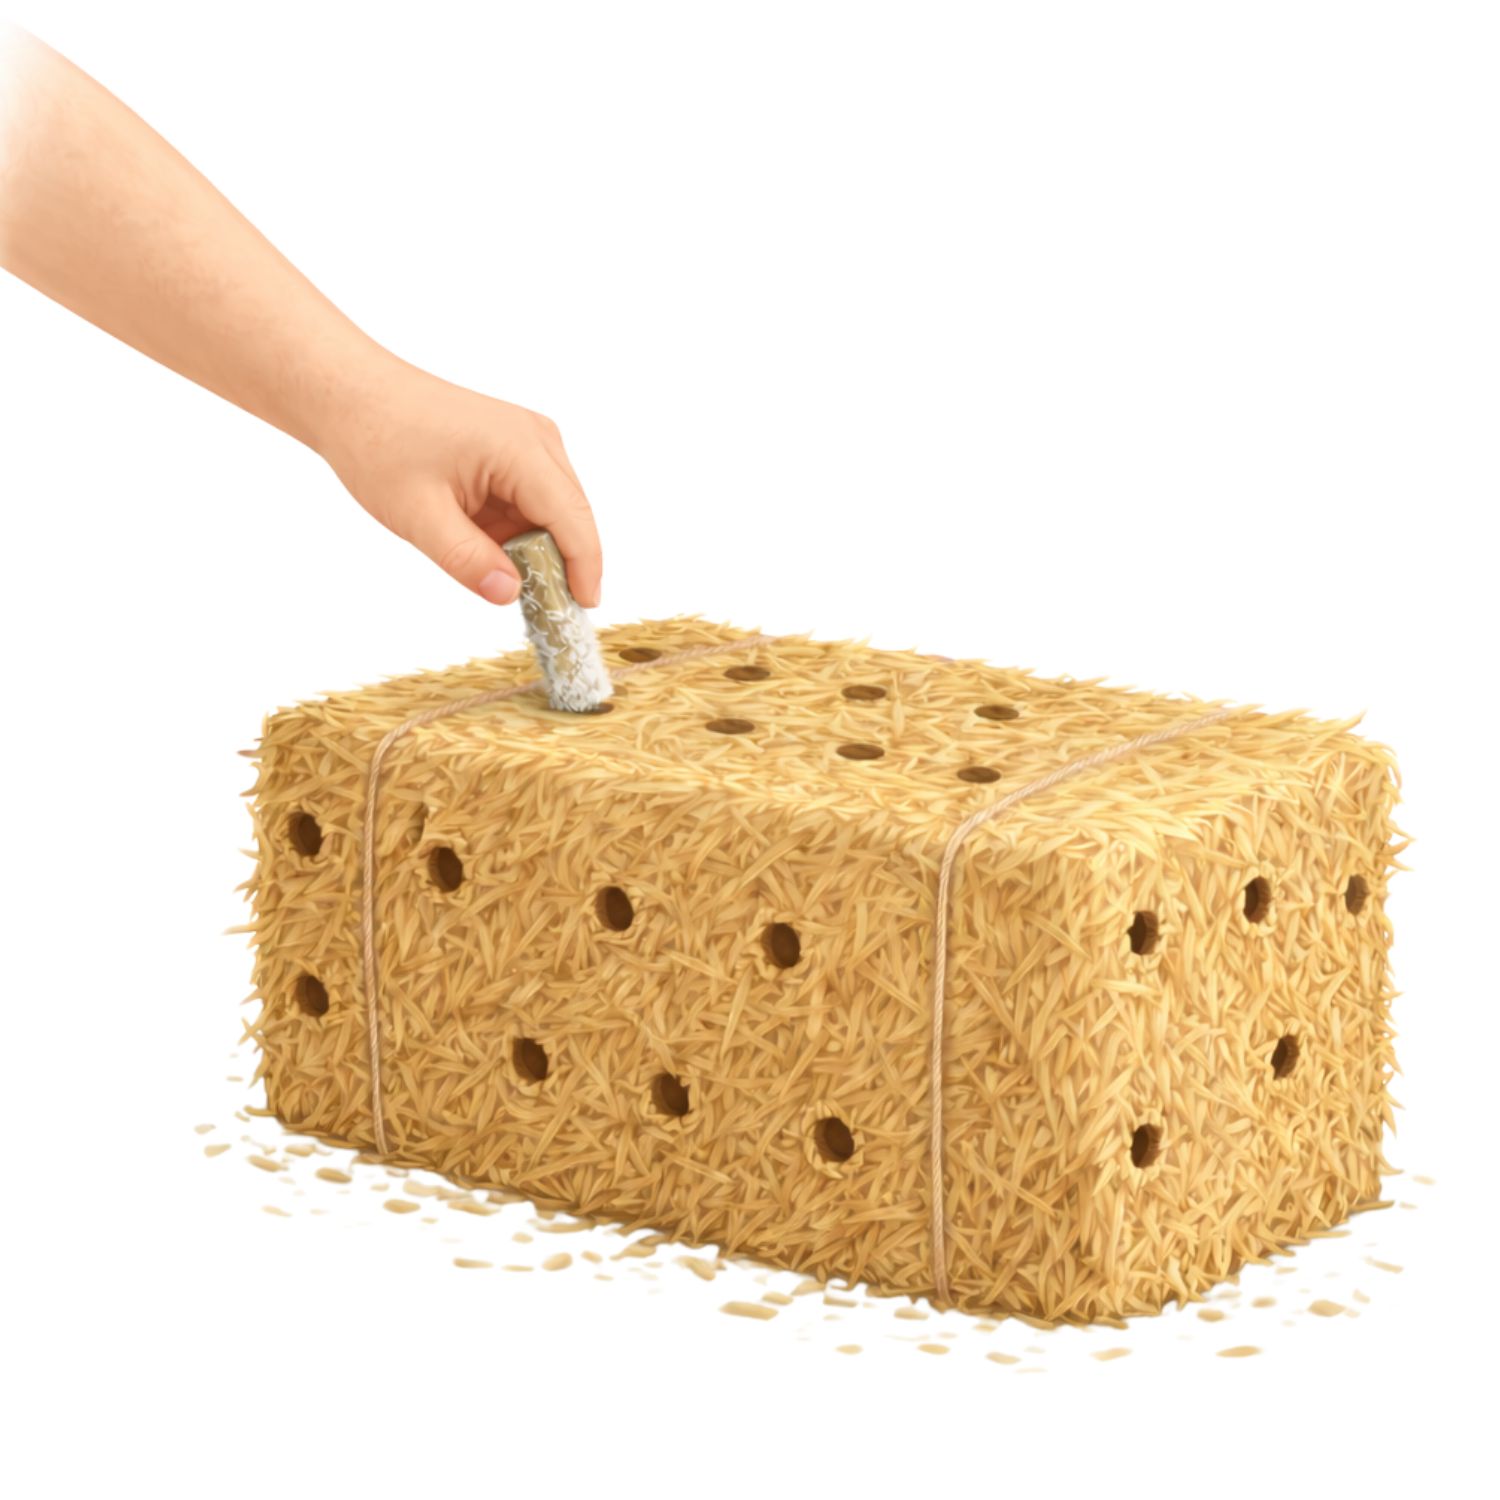
Drücke nun mit einem dünnen Besenstiel oder einem ähnlichen Gegenstand etwa 20 Löcher, ca. 20 cm tief, gleichmäßig verteilt in den Strohballen. Stecke jetzt die Dübel ein und drücke sie tief in die Löcher. Verschließe die Löcher anschließend wieder gut mit Stroh, sodass ein direkter Kontakt zwischen Stroh und Dübel besteht. Liegt der Dübel in einem Hohlraum, kann sich das Myzel nicht auf das Stroh übertragen.
Schritt 3
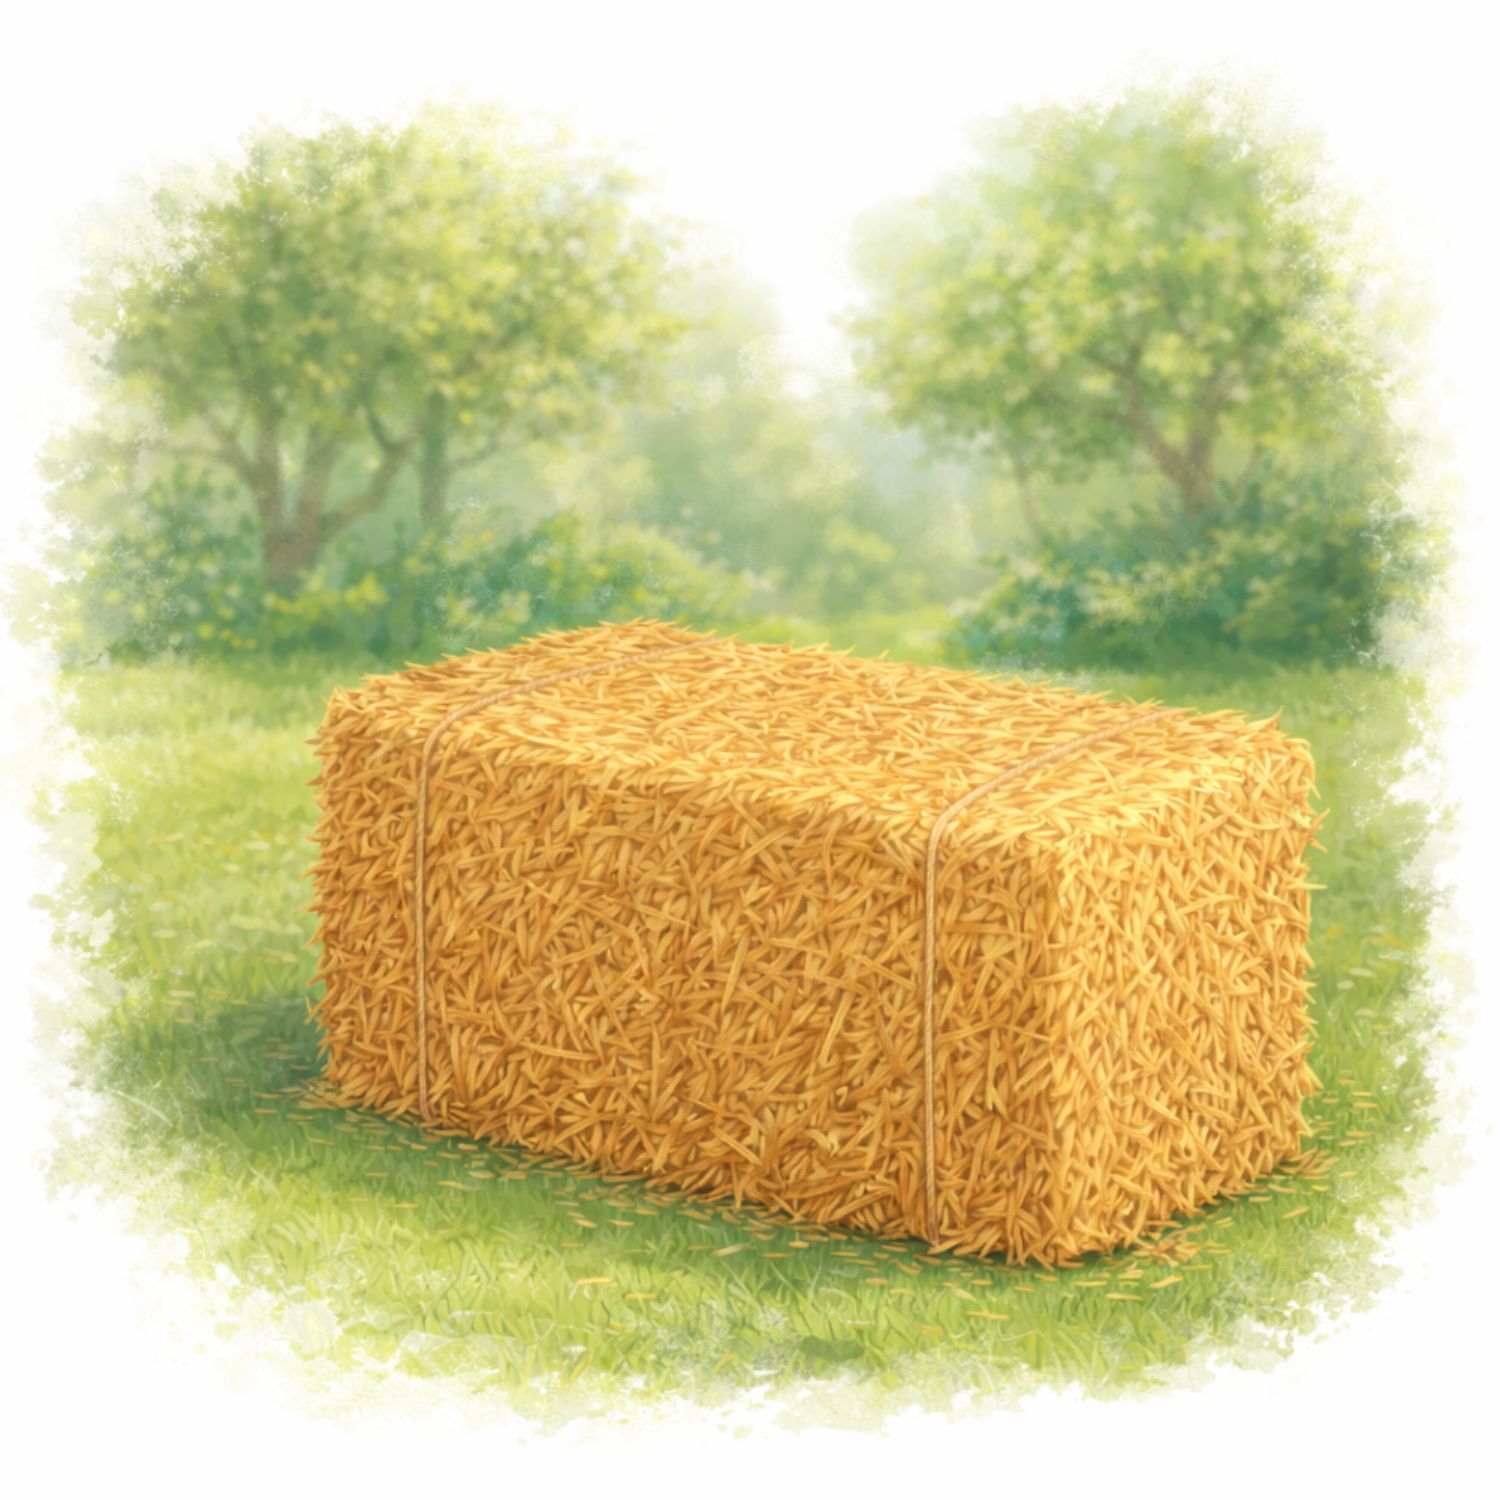
Stelle den Strohballen nun an einem geeigneten Standort im Garten auf. Schütze die Pilzkultur am besten von Anfang an vor Schnecken, da sie deine Pilze lieben werden!
Schritt 4
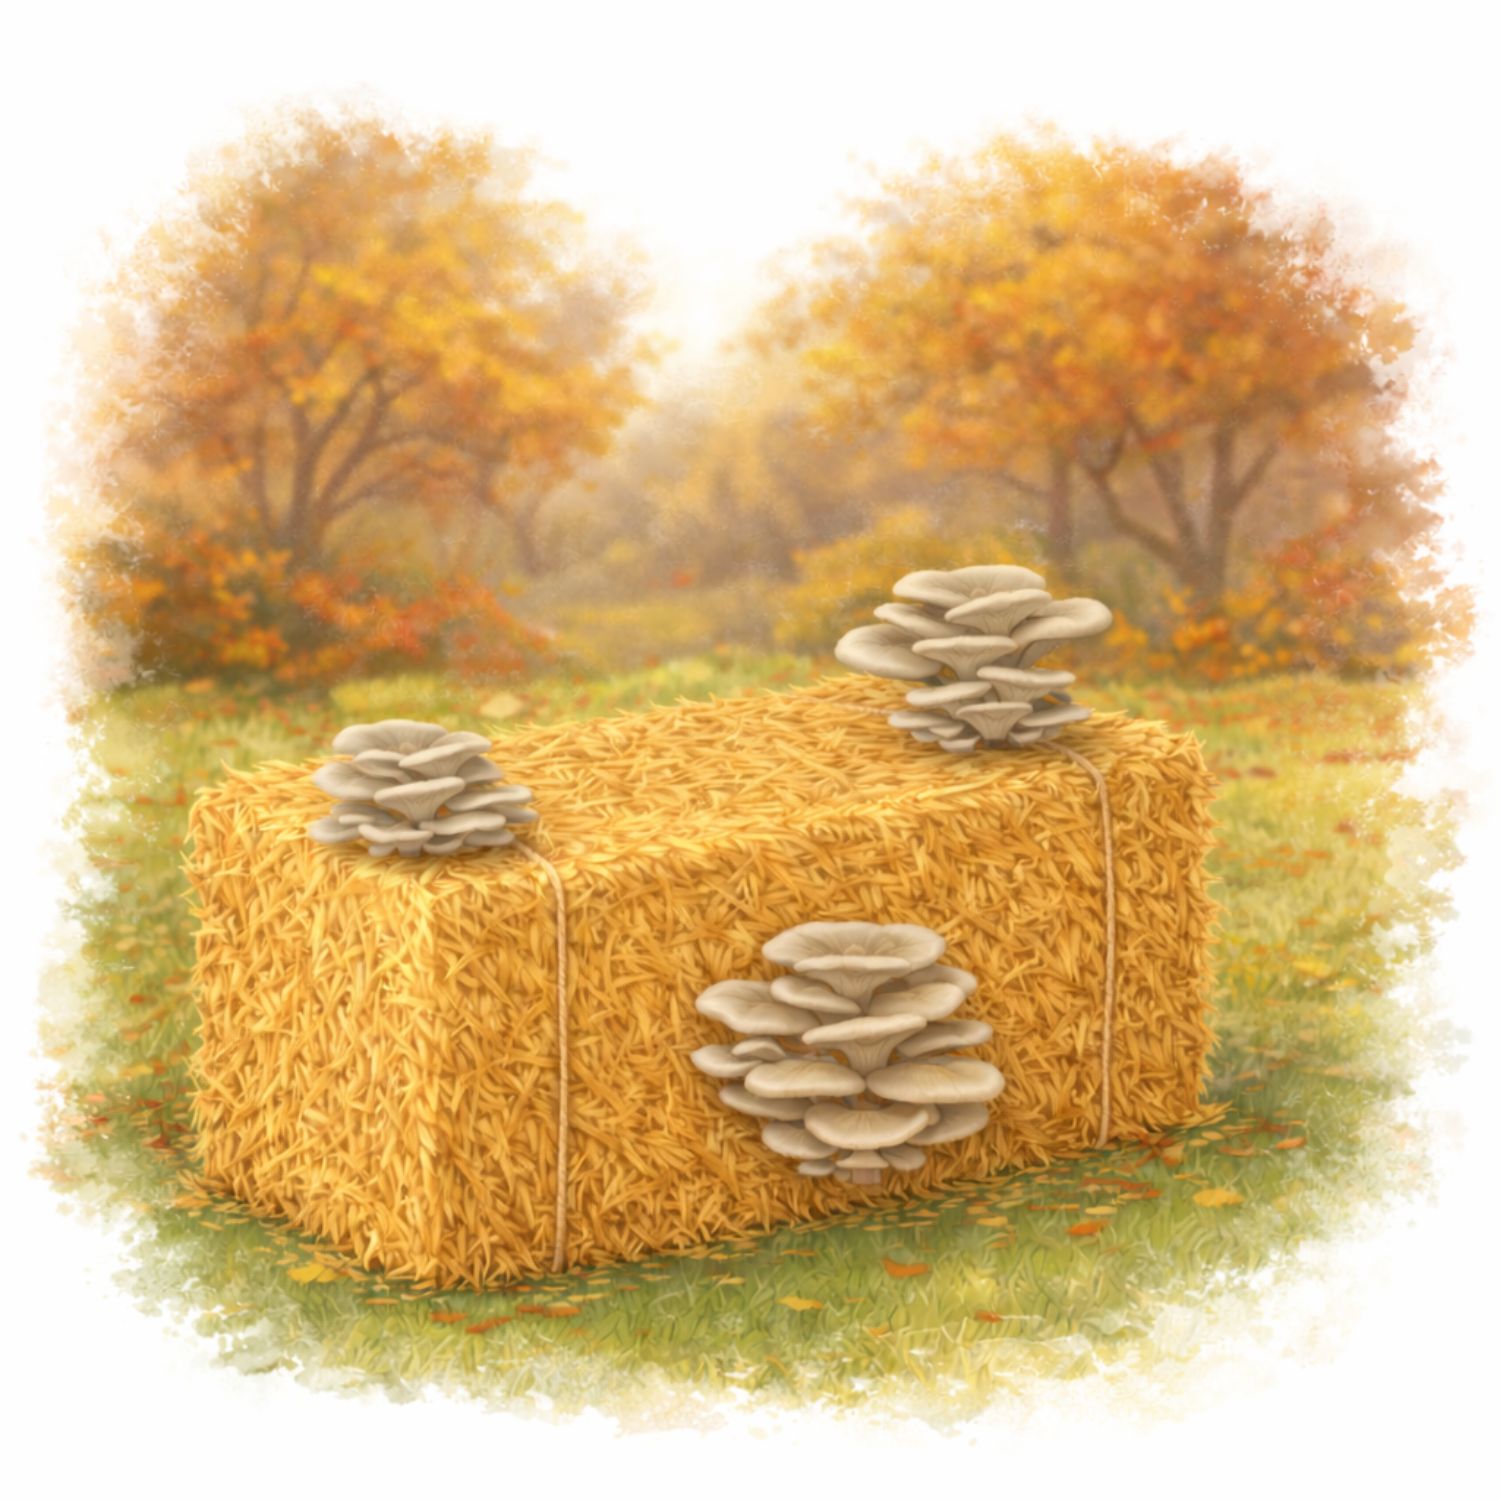
Schon ist die Pilzkultur fertig angelegt.
Achte darauf, dass der Strohballen keinen Dauerregen abbekommt, denn zu starke Nässe kann das Myzel abtöten. Schütze die Pilzkultur bei anhaltendem Regen mit einer Folie. Die Folie kann auch dauerhaft eingesetzt werden, da sie das Wachstum verbessert. Achte hier aber vermehrt auf ausreichende Feuchtigkeit und stich einige Löcher in die Folie, um Luftaustausch zu schaffen.
Rund um die Ernte
Die Dauer bis zur Ernte hängt von vielen Faktoren ab, liegt aber meist bei 2-5 Monaten. Die Erntewellen dauern etwa 12 Monate an. Für die Bildung von Fruchtkörpern sind milde Temperaturen und hohe (Luft-) Feuchtigkeit nötig.
Erntephasen liegen daher meist in Frühjahr und Herbst. Bitte beachte, dass sich Fremdpilze im Stroh ansiedeln können. Vergewissere dich vor dem Verzehr, dass es sich tatsächlich um den Zuchtpilz handelt!
Häufige Fragen & Antworten
Kann ich mehrere Pilzsorten auf einem Strohballen anbauen?
Muss ich die Pilzkultur nach dem Anlegen zusätzlich versorgen?
Wie viel und lange kann ich ernten?
Kann ich überprüfen, ob das Anlegen der Pilzkultur funktioniert hat?
Es wachsen Pilze, aber nicht die, die ich angebaut habe. Hat der Anbau nicht funktioniert?
Besonders in den ersten Wochen und Monaten, in denen sich das Pilzmyzel noch nicht stark ausgebreitet hat, siedeln sich oft schnell wachsende Fremdpilze an und bilden (oft relativ kleine) Fruchtkörper. Das kann passieren und bedeutet nicht, dass das Beimpfen fehlgeschlagen ist.
Entferne die Fremdpilze, um eine weitere Ausbreitung zu verhindern. Der eigentliche Zuchtpilz verdrängt das Fremdmyzel mit zunehmender Ausbreitung in der Regel vollständig.
Downloads & Videos
Pilzzucht auf Kaffeesatz
Inhaltsübersicht
Vor dem Anbau gut zu wissen
Haltbarkeit
Die Pilzdübel können für bis zu 12 Monate im Kühlschrank zwischengelagert werden. Eine kurzfristige Aufbwahrung (maximal 1-2 Monate) ist auch bei Raumtemperatur möglich.
Schimmel
Kaffeesatz ist anfälig für die Ansiedlung von Schimmelpilzen. Achte daher darauf, möglichst ale Kontaktflächen von dem Kaffeesatz und deinen Pilzdübeln (Gläser, Hände, Löffel etc.) vorab zu desinfizieren.
Für den Erfolg deiner Pilzzucht ist es zudem wichtig, ausschließlich tagesfrischen Kaffeesatz zu verwenden. Bei älterem Kaffeesatz ist die Wahrscheinlichkeit hoch, dass sich bereits Schimmelsporen angesiedelt haben. Diese können für einen Totalausfall deiner Pilzkultur sorgen.
Ausreichende Dübelmenge
Es ist zwingend notwendig, ausreichend Pilzdübel zu verwenden, da andernfalls Schimmelpilze den Kaffeesatz besiedeln und den Zuchtpilz vollständig verdrängen. Zur groben Orientierung: Du solltest zum Ansiedeln des Zuchtpilzes mindestens einen Dübel je gehäuften Esslöffel Kaffeesatz verwenden.
Die Dübelmenge kann nach Belieben erhöht werden, um das Ausfallrisiko zusätzlich zu senken und die Dauer bis zur Ernte zu verkürzen. Ebenso ist es möglich, parallel mehrere kleine Kaffeesatz-Mengen separat zu beimpfen und diese nach dem Durchwachsen mit Myzel zusammenzuführen.
Dauer bis zur ersten Ernte
Die Pilzzucht auf Kaffeesatz ist eine relativ schnelle Methode. Theoretisch kannst du schon innerhalb von vier Wochen eine Ernte erreichen.
Da die Erntemenge aber mit der Menge an zugeführten Nährstoffen (und damit der zeitlichen Dauer) steigt, lohnt es sich Geduld zu haben. Konkret heißt das: Je mehr Kaffeesatz dem Pilz zur Verfügung steht, desto mehr Fruchtkörper kann er bilden. Ein Richtwert für Gesamtdauer bis zur ersten großen Ernte sind etwa 2-3 Monate.
Das brauchst du
Für diese Methode brauchst du ein Desinfektionsspray aus der Drogerie, zwei Vorratsgläser oder Dosen mit Deckel (ca. 200 ml), einen Behälter aus Glas oder Kunststoff wie zum Beispiel einen kleinen Kübel oder eine Box, etwa einmal wöchentlich frischen Kaffeesatz sowie einen sauberen Esslöffel.
Der richtige Standort
Auch beim Thema Standort ist die Kaffeesatz-Methode denkbar unkompliziert: Während der Durchwachsphase, in der sich das Myzel im Kaffeesatz ausbreitet, kannst du die Pilzkultur einfach im Haus oder der Wohnung aufstellen, zum Beispiel in der Küche oder im Wohnzimmer. Damit das Myzel optimal wachsen kann, sollte die Temperatur etwa zwischen 20-25°C liegen. Tageslicht kann, muss aber in dieser Phase nicht vorhanden sein.
Für die Erntephase ändern sich die Standortanforderungen ein bisschen. Für die Fruchtkörperbildung benötigt die Pilzkultur zwingend Licht. Sowohl indirektes Tageslicht oder künstliche Beleuchtung sind dafür bestens geeignet. Direkte Sonneneinstrahlung sollte aber auf jeden Fall vermieden werden. Je nach Pilzart ändert sich auch der benötigte Temperaturbereich:
- Austernpilze: 12-18°C
- Limonenpilze: 16-24°C
So legst du deine Pilzkultur an

Schritt 1
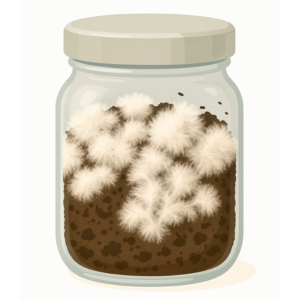
Reinige deine Vorratsgläser vorab gründlich und desinfiziere sie mit Desinfektionsspray. Besprühe dann auch deine Hände und den Esslöffel. Nimm etwas Kaffeesatz zur Hand und befülle die beiden Gläser jeweils zu einem Viertel. Drücke dann je 5-10 Pilzdübel (je mehr desto besser) hinein und fülle ein weiteres Viertel mit Kaffeesatz auf. Verschließe die Gläser und stelle sie bei Raumtemperatur auf.
Schritt 2
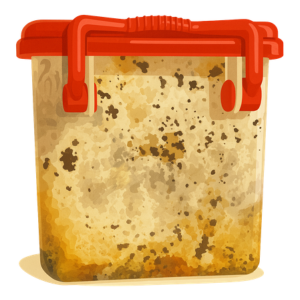
Nach 7 Tagen solte sich das Myzel sichtbar als weißes Geflecht im Kaffeesatz ausgebreitet haben. Fülle die Gläser mit frischem Kaffeesatz nun vollständig. Solte das Myzel noch nicht großflächig ausgebreitet sein, gib der Pilzbrut noch etwas Zeit, bevor du nachfüllst. Beginne mit Schritt 3 erst, wenn mindestens eines der Gläser gut mit Myzel durchwachsen ist
Schritt 3
Nun ist es Zeit, deine Pilzkultur in einen großen Behälter (z.B. einen kleinen Eimer mit Deckel) umzusiedeln. Je größer dieser ist, desto länger dauert es, bis deine Pilzkultur wachstumsreif ist - aber desto mehr Pilze können auch wachsen.
Fülle den Behälter etwa zu gleichen Anteilen mit vom Pilz besiedelten und dem frischem Kaffeesatz. Vermische alles mit einem Löffel (der Myzel-Kaffeesatz kann zerbröselt werden). Verschließe den Behälter anschließend mit einem Deckel oder Frischhaltefolie und gib dem Myzel wieder Zeit zu wachsen.
Schritt 4
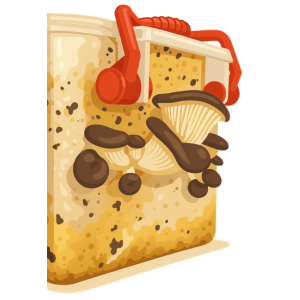
Gib nun 1-2 mal wöchentlich frischen Kaffeesatz dazu. Wenn dein Behälter voll ist, kannst du die Fruchtungsphase einleiten. Nimm dazu den Deckel bzw. die Folie ab (Kunststoffbehälter kannst du auch seitlich einschneiden) und stelle die Pilzbrut an einem möglichst feuchten Ort mit 12-18°C (Austernpilze) oder 16-24°C (Limonenpilze) auf. Erste Pilze zeigen sich in wenigen Wochen, oft schon nach einigen Tagen.
Die 100%-Recycling-Methode für Fortgeschrittene
Wenn bei dir täglich frischer Kaffeesatz anfällt und du 100 % davon mit deiner eigenen Pilzzucht recyclen möchtest, kannst du einfach zeitversetzt mehrere verschiedene Pilzkulturen anlegen. Für einen Haushalt mit ein oder zwei Kaffeetrinkern eignen sich zum Beispiel sieben verschiedene Pilzbrut-Behälter am besten.
So kannst du an jedem Tag der Woche eine andere Pilzkultur mit frischem Kaffeesatz versorgen. Da das Myzel die Portion Kaffeesatz in der Regel in 7 Tagen vollständig durchwächst, entsteht ein idealer Wachstumszyklus, in dem du deinen kompletten Kaffeesatz nutzen und dauerhaft reichlich frische Pilze ernten kannst.
Wenn die Nährstoffe im Kaffeesatz nach den Erntewellen verbraucht sind, kannst du die Reste des Substrats einfach kompostieren, die Behälter reinigen und mit neuen Dübeln die nächste Pilzkultur anlegen.
Rund um die Ernte
Pilze wachsen im Kaffeesatz so lange weiter, bis die Nährstoffe im Substrat verbraucht sind. Manchmal ist das bereits nach der ersten, besonders großen Ernte der Fall. Häufig entstehen aber noch ein bis zwei weitere Erntewellen. Damit diese überhaupt stattfinden können, ist die richtige Pflege der Pilzkultur wichtig.
Nach der Ernte braucht das Pilzmyzel zunächst etwas Zeit, um sich zu erholen. Das kann einige Tage bis mehrere Wochen dauern. Da Pilze zu etwa 90 % aus Wasser bestehen, fehlt dem Substrat nach der Ernte ein Teil der Feuchtigkeit. Diese musst du wieder ausgleichen. Drücke oder steche dafür von oben einige Löcher in den Kaffeesatz und gieße anschließend frisches Wasser darauf. Achte darauf, dass sich keine Staunässe bildet und der Kaffeesatz nicht zu matschig wird.
Die benötigte Wassermenge richtet sich nach der Erntemenge. Wiege deine Pilze einfach ab und gib ungefähr die gleiche Menge Wasser hinzu. Wenn du zum Beispiel 250 g Pilze geerntet hast, braucht das Substrat etwa 250 ml Wasser. Falls der Kaffeesatz das Wasser nicht auf einmal aufnehmen kann, kannst du die Menge auch auf mehrere Tage verteilen.
Während der Ruhephase solltest du darauf achten, dass die Pilzkultur nicht austrocknet. Du kannst sie dafür abdecken oder regelmäßig leicht mit Wasser besprühen. Wichtig ist ein gutes Gleichgewicht: Das Substrat sollte feucht bleiben, aber nicht zu nass sein. Nur unter diesen Bedingungen kann sich eine neue Erntewelle gut entwickeln.
Wichtig: Achte bei der Ernte darauf, dass keine Reste vom Stiel am Kaffeesatz-Substrat zurückbleiben. Schon kleine Rückstände reichen nämlich aus, um eine Schimmelkontamination der ganzen Pilzkultur zu verursachen.
Häufige Fragen & Antworten
Wie frisch muss der Kaffeesatz sein?
Wie feucht sollte der Kaffeesatz sein?
Wie lange dauert es, bis die Pilze wachsen?
Warum wächst nur weißes Myzel, aber keine Pilze?
Was kann ich tun, wenn der Kaffeesatz austrocknet?
Zum Austrocknen des Kaffeesatzes kann es in aller Regel erst kommen, wenn du den Behälter öffnest und damit die Fruchtungsphase einleitest. In dieser Phase ist es sehr empfehlenswert, die Pilzkultur an einem Standort mit sehr hoher Luftfeuchtigkeit (bis zu 95 %) aufzustellen und/oder 2-3 mal wöchentlich leicht mit einem Haushaltssprüher zu befeuchten.
So beugst du Austrocknung schon frühzeitig vor. Sollte es dafür schon zu spät sein, kannst du einige Löcher in den Kaffeesatz drücken und über mehrere Tage etwas Wasser hinzugeben. Achte darauf, dass das Wasser gut aufgenommen wird und keine Staunässe oder Verschlammung entsteht.
Downloads & Videos
ENGLISH VERSION
Mushroom plugs for cultivation on wood, straw and coffee grounds
What material would you like to grow mushrooms on?
Please select:
Cultivation on wood
Table of contents
Good to know before you start
Shelf life
The mushroom plugs can be stored in the refrigerator for up to 12 months. Short-term storage (maximum 1–2 months) is also possible at room temperature.
Best time to set it up
Ideally, set up your mushroom log in spring or late summer. Depending on your region, other times are also possible, as long as there is no frost during the first two months after setting it up.
In the initial phase, you should also avoid midsummer heat and drought. It’s best to keep this in mind in advance and plan your setup time accordingly.
Using enough plugs
It’s essential to use enough mushroom plugs—otherwise the mushroom culture may fail completely. For one pack of 20 plugs, we recommend a log with a maximum diameter and height of 12-16 inches.
You can increase the number of plugs as you like to further reduce the risk of failure and shorten the time until harvest. It’s also possible to inoculate a larger log, as long as the number of plugs is increased accordingly.
Time Until First Harvest
Growing mushrooms on wood requires a bit of patience. It takes time for the mycelium to fully colonize the log and become ready to produce fruiting bodies. Depending on weather conditions and the type of wood used, it can take at least 12 to 24 months before you can expect your first harvest.
However, your patience will be rewarded with abundant growth and harvest waves over several years.
Which type of wood can I use?
In general, many different hardwoods can be used—softwood is unsuitable in all cases. The types listed below are especially reliable.
Please choose the mushroom species you want to grow:
Oyster mushroom
Golden oyster mushroom
The wood must be fresh (felled one to a maximum of six months ago). The bark should be as intact as possible. If the cut surface already shows deep cracks, the wood is too dry and should be soaked for 24 hours beforehand.
Mushrooms grow best on thicker logs from 8-16 inches in diameter with a length of 12–16 inches. Shiitake prefers thinner wood about 40 inches long and 4-8 inches in diameter.
Choosing the right location
Choose a moist, shady, and preferably wind-sheltered spot in the garden - ideally under deciduous trees or shrubs. Please note that temperatures above +38 °C can kill the mycelium.
The spawn starts growing from about +10 °C and grows fastest at around +25 °C. After about three months within this temperature range, the mushroom log becomes frost-hardy.
How to set up your mushroom log
Step 1
Using an 0.35 inches drill bit, drill holes on the side of the log, evenly distributed all around, about 2 inches deep for each plug. The hole diameter should not be too large so the mycelium in the plugs has good contact with the wood. It’s important that the holes remain clean—sawdust is not a problem.
Step 2
Now insert one plug into each hole. Then seal the holes with tape, corks, clay, or beeswax so the plugs don’t fall out and are protected from dirt. If you use tape, it’s best to wrap it once around the log so it doesn’t come loose right away due to weather. Make sure to leave enough un-taped space for the fruiting bodies.
Step 3
Place the log in a suitable spot in the garden and, for best development, bury it a few centimeters into the ground. If you’re growing shiitake, you can simply lay the longer log horizontally on the ground. For protection, cover the log with organic material such as brushwood, straw, a jute sack, or something similar.
Step 4
That’s it—your mushroom log is set up!
Protect it by watering during long dry periods, and during persistent heavy rain by placing a cover (only for that time) over it. Also take early precautions against slugs—they’ll love your mushrooms!
All about harvesting
The time until the first harvest depends heavily on the type of wood, the mushroom species, and especially the weather. In most cases, it takes 12–24 months. Fruiting bodies appear only at mild temperatures and high (air) humidity. Harvest periods are therefore typically in spring and autumn. In many cases, mushrooms will fruit repeatedly for 3–5 years.
Before eating, always make sure it really is the edible cultivated mushroom!
Frequently asked questions
Can I grow multiple mushroom species on one log?
Do I need to care for the log after setting it up?
How much can I harvest, and for how long?
Can I check whether inoculation worked?
Mushrooms are growing, but not the ones I inoculated. Did it fail?
Especially in the first weeks and months—while the cultivated mycelium is still spreading—fast-growing “wild” fungi may colonize the wood and produce (often small) fruiting bodies. This can happen and does not mean the inoculation failed.
Remove these unwanted mushrooms to prevent further spread. As it expands, the cultivated mushroom usually outcompetes the foreign mycelium completely.
Download
Cultivation on straw
Table of contents
Good to know before you start
Shelf life
The mushroom plugs can be stored in the refrigerator for up to 12 months. Short-term storage (maximum 1–2 months) is also possible at room temperature.
Best time to set it up
Ideally, you should start your wood mushroom culture in spring or late summer. Depending on the region, other times of year are also possible, as long as there is no frost in the first two months after planting.
You should also avoid high summer heat and drought in the initial phase. It is best to take this into account in advance and plan the planting time accordingly.
Using enough mushroom plugs
It is essential to use sufficient mushroom plugs, as otherwise the mushroom culture will fail completely. We recommend a straw bale with a dry weight of 10 kg for a pack of 20 plugs.
The number of plugs can be increased as desired to further reduce the risk of failure and shorten the time to harvest. It is also possible to grow the mushroom culture on a larger straw bale, as long as the number of plugs is increased accordingly.
Time Until First Harvest
Growing mushrooms on straw requires a little patience. Depending on weather conditions and mushroom type, it takes around 6-16 weeks for the straw bale to become overgrown with mycelium.
Only when this is the case and the weather is suitable can the first mushrooms appear. For example, if your mushroom culture is established in the spring, the straw bale may be overgrown with mycelium by June, but the first mushrooms will not grow until late fall, when it is cool and damp again. Your patience will be rewarded with abundant harvests over a period of about 12 months.
Which type of straw can I use?
You will need a high-pressure compressed straw bale with a dry weight of approx. 10 kg. Make sure you purchase the straw from an organic farm. If the grain has been treated with fungicides, it will not be possible to grow mushrooms on it.
The straw should also be healthy and dry. You can tell this by its golden yellow color and firm stalks that are difficult to tear. You should not use moldy straw, as it is often already colonized by mold. Wheat, rye, or barley are particularly suitable—oats are unsuitable.
Choosing the right location
Choose a moist, shady, and preferably wind-sheltered spot in the garden - ideally under deciduous trees or shrubs. Please note that temperatures above +38 °C can kill the mycelium.
The spawn starts growing from about +10 °C and grows fastest at around +25 °C. After about three months within this temperature range, the mushroom culture becomes frost-hardy.
How to set up your mushroom culture
Step 1
The straw must be well watered before inoculation. To do this, immerse the bale completely in water for about two days, for example in a rain barrel or wheelbarrow. Alternatively, you can water it thoroughly several times over several days until it has absorbed enough moisture. Warm water accelerates water absorption. To check, pull a tuft from the inside and wring it out: if water droplets form, it is moist enough.
Step 2
Now use a thin broomstick or similar object to make around 20 holes, approx. 20 cm deep, evenly distributed throughout the straw bale. Insert the mushroom plugs and press them deep into the holes. Then seal the holes well with straw so that there is direct contact between the straw and the plug. If the plug is in a cavity, the mycelium cannot transfer to the straw.
Step 3
Now place the straw bale in a suitable location in the garden. It is best to protect the mushroom culture from snails right from the start, as they will love your mushrooms!
Step 4
That’s it—your mushroom culture is set up!
Make sure that the straw bale is not exposed to continuous rain, as excessive moisture can kill the mycelium. Protect the mushroom culture with plastic sheeting during prolonged periods of rain. The plastic sheeting can also be used permanently, as this improves growth. However, make sure there is sufficient moisture and poke a few holes in the plastic sheeting to allow air to circulate.
All about harvesting
The time until harvest depends on many factors, but is usually between 2 and 5 months. The harvest waves last for around 12 months. Mild temperatures and high (air) humidity are necessary for the formation of fruiting bodies.
Harvesting therefore usually takes place in spring and fall. Please note that foreign fungi can settle in the straw. Before consumption, make sure that it is actually the cultivated mushroom!
Frequently asked questions
Can I grow several types of mushrooms on one straw bale?
You therefore need a separate straw bale for each type of mushroom.
Do I need to care for the mushroom culture after setting it up?
How much can I harvest, and for how long?
Can I check whether inoculation worked?
Mushrooms are growing, but not the ones I inoculated. Did it fail?
Especially in the first weeks and months—while the cultivated mycelium is still spreading—fast-growing “wild” fungi may colonize the wood and produce (often small) fruiting bodies. This can happen and does not mean the inoculation failed.
Remove these unwanted mushrooms to prevent further spread. As it expands, the cultivated mushroom usually outcompetes the foreign mycelium completely.
Download
Mushroom cultivation on coffee grounds
Table of contents
Good to know before growing
Shelf life
The mushroom plugs can be stored in the refrigerator for up to 12 months. Short-term storage (maximum 1-2 months) is also possible at room temperature.
Mold
Coffee grounds are susceptible to mold growth. Therefore, make sure to disinfect all contact surfaces between the coffee grounds and your mushroom plugs (glasses, hands, spoons, etc.) in advance.
For your mushroom cultivation to be successful, it is also important to use only coffee grounds that are fresh from the day. Older coffee grounds are likely to already contain mold spores. These can cause your mushroom culture to fail completely.
Sufficient quantity of mushroom plugs
It is essential to use enough mushroom plugs, otherwise mold will colonize the coffee grounds and completely displace the cultivated mushroom. As a rough guide, you should use at least one plug per heaped tablespoon of coffee grounds to cultivate the mushroom.
The amount of plugs can be increased as desired to further reduce the risk of failure and shorten the time to harvest. It is also possible to inoculate several small amounts of coffee grounds separately and combine them with mycelium after they have grown through.
Time until first harvest
Growing mushrooms on coffee grounds is a relatively quick method. In theory, you can harvest them within four weeks.
However, since the harvest yield increases with the amount of nutrients supplied (and thus the duration), it is worth being patient. Specifically, this means that the more coffee grounds are available to the fungus, the more fruiting bodies it can form. A guideline for the total duration until the first large harvest is approximately 2-3 months.
What you need
For this method, you will need a disinfectant spray from the drugstore, two storage jars or cans with lids (approx. 200 ml), a glass or plastic container such as a small bucket or box, fresh coffee grounds about once a week, and a clean tablespoon.
The right location
When it comes to location, the coffee grounds method is also very straightforward: during the growth phase, when the mycelium spreads in the coffee grounds, you can simply set up the mushroom culture in your house or apartment, for example in the kitchen or living room. For the mycelium to grow optimally, the temperature should be between 20-25°C. Daylight can be present during this phase, but is not essential.
The location requirements change slightly for the harvesting phase. The mushroom culture requires light for fruit body formation. Both indirect daylight and artificial lighting are ideal for this. However, direct sunlight should be avoided at all costs. The required temperature range also varies depending on the type of mushroom:
- Oyster mushrooms: 12-18°C
- Golden Oyster mushrooms: 16-24°C
Procedure
Step 1
Clean your storage jars thoroughly in advance and disinfect them with disinfectant spray. Then spray your hands and the tablespoon. Take some coffee grounds and fill each of the two jars a quarter full. Then press 5-10 mushroom plugs (the more the better) into each jar and fill another quarter with coffee grounds. Close the jars and store them at room temperature.
Step 2
After 7 days, the mycelium should have spread visibly as a white network in the coffee grounds. Now fill the jars completely with fresh coffee grounds. If the mycelium has not yet spread over a large area, give the mushroom spawn some more time before refilling. Only start with step 3 when at least one of the jars is well covered with mycelium.
Step 3
Now it's time to transfer your mushroom culture to a large container (e.g., a small bucket with a lid). The larger the container, the longer it will take for your mushroom culture to mature—but the more mushrooms you will be able to grow.
Fill the container with roughly equal parts of mushroom-colonized and fresh coffee grounds. Mix everything together with a spoon (the mycelium coffee grounds can be crumbled). Then close the container with a lid or cling film and give the mycelium time to grow again.
Step 4
Now add fresh coffee grounds 1-2 times a week. When your container is full, you can start the fruiting phase. To do this, remove the lid or foil (you can also cut into the side of plastic containers) and place the mushroom spawn in a place that is as humid as possible at 12-18°C (oyster mushrooms) or 16-24°C (lime mushrooms). The first mushrooms will appear in a few weeks, often after just a few days.
The 100% recycling method for advanced growers
If you produce fresh coffee grounds every day and want to recycle 100% of them with your own mushroom cultivation, you can simply create several different mushroom cultures at different times. For a household with one or two coffee drinkers, for example, seven different mushroom spawn containers are ideal.
This allows you to supply a different mushroom culture with fresh coffee grounds every day of the week. Since the mycelium usually grows completely through the portion of coffee grounds in 7 days, this creates an ideal growth cycle in which you can use all of your coffee grounds and harvest plenty of fresh mushrooms on a permanent basis.
Once the nutrients in the coffee grounds have been used up after the harvest waves, you can simply compost the remains of the substrate, clean the containers, and start the next mushroom culture with new mushroom plugs.
All about harvesting
Mushrooms continue to grow in coffee grounds until the nutrients in the substrate are depleted. Sometimes this happens after the first, particularly large harvest. However, there are often one or two more harvests. Proper care of the mushroom culture is important to ensure that these can take place.
After harvesting, the mushroom mycelium first needs some time to recover. This can take anywhere from a few days to several weeks. Since mushrooms consist of about 90% water, the substrate lacks some of its moisture after harvesting. You need to compensate for this. To do this, press or poke a few holes in the coffee grounds from above and then pour fresh water on them. Make sure that no waterlogging occurs and that the coffee grounds do not become too mushy.
The amount of water required depends on the harvest quantity. Simply weigh your mushrooms and add approximately the same amount of water. For example, if you have harvested 250 g of mushrooms, the substrate needs about 250 ml of water. If the coffee grounds cannot absorb the water all at once, you can spread the amount over several days.
During the resting phase, you should make sure that the mushroom culture does not dry out. You can cover it or spray it lightly with water regularly. It is important to strike a good balance: the substrate should remain moist, but not too wet. Only under these conditions can a new harvest wave develop well.
Important: When harvesting, make sure that no remains of the stem are left on the coffee grounds substrate. Even small residues are enough to cause mold contamination of the entire mushroom culture.
Frequently asked questions & answers
How fresh should the coffee grounds be?
How moist should the coffee grounds be?
How long does it take for the mushrooms to grow?
Why is only white mycelium growing, but no mushrooms?
What can I do if the coffee grounds dry out?
The coffee grounds will usually only dry out when you open the container and thus initiate the fruiting phase. During this phase, it is highly recommended to place the mushroom culture in a location with very high humidity (up to 95%) and/or to lightly moisten it 2-3 times a week with a household spray bottle.
This will prevent them from drying out at an early stage. If it is already too late for this, you can press a few holes into the coffee grounds and add a little water over several days. Make sure that the water is absorbed well and that no waterlogging or silting occurs.
Download

Enoki wachsen auf Holz – mit den Dübeln ziehst du Nachschub im eigenen Garten.